Wednesday, January 30, 2013

Odd Little Man But Oh So Fun!

Just before the our vacation, the kids (I call them kids but really they are adults and about to be married!) went shopping and came home with the CUTEST sunglasses! We all tried them on and took pictures then Jen put together a collage.


Clockwise from left Ryan (the fiance') Jen ( the daughter), Me, and my husband Paul. Aren't the glasses funny? We were cracking stupid mustache jokes, which by the way can be spelled mustache or moustache depending on the dictionary you use (strange I know).

Right around the same time the wonderful Karen - the Graphics Fairy put up this odd little man on her blog. He fit the bill for the perfect mustache card. So I added a sentiment that I found on Fontspace called Chaplin Type. The font has mustaches too! And away I went on an idea for the card. I finished it last night.


Two styles of mustaches - I like the one on the left the best.


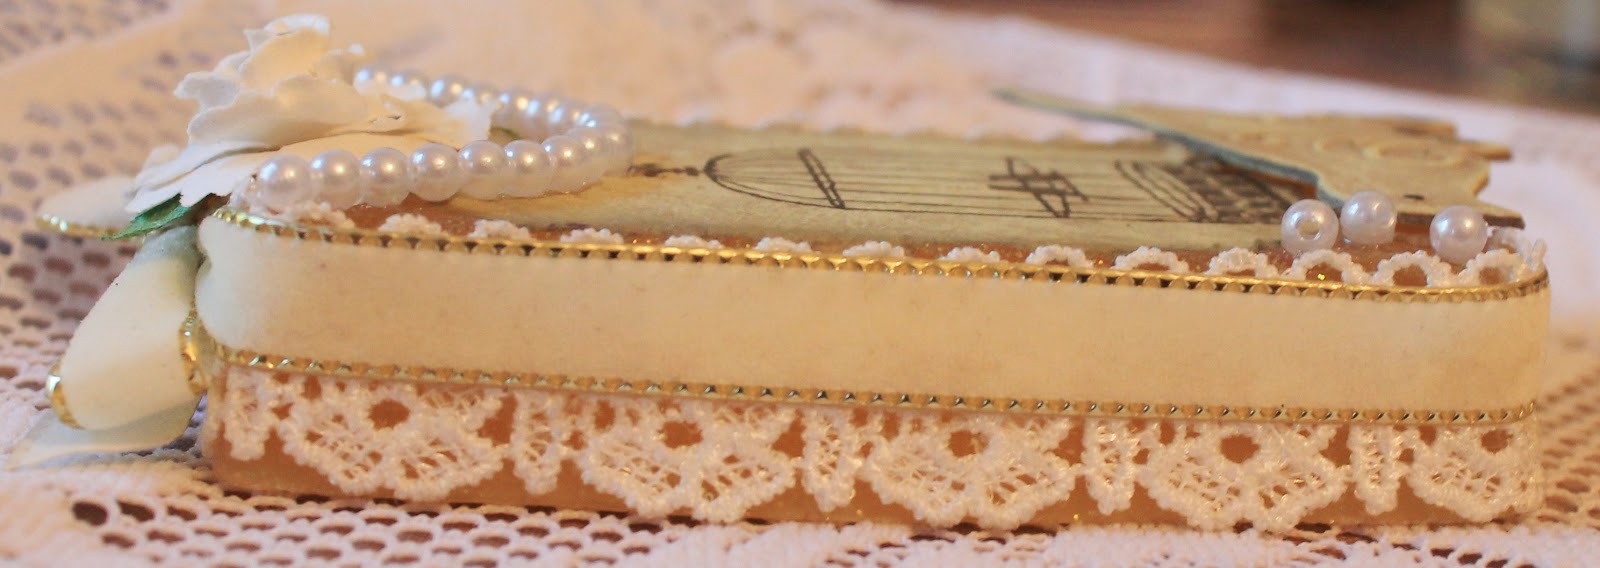
I also made a book mark for the top, I didn't like the card with just the mustache so I thought the nose
 thing would make it stand out more. I literally flooded the glasses with glossy accents. I think I used a good 1/4 of a bottle and unfortunately I ended up with bubbles but it still looks cool. I'm thinking I should have used my DecoArt glass texture but I didn't think I could get the shape I needed with that medium.

And the question is....


Ha! Do you think he's sexy? I can't help but laugh he's so funny looking. What could  be more appropriate? You can see the stick I inserted through the top for the book mark and I used a bit of gold Washi Tape to hold it flat.

So that's my "moustachetic" adventures in sunglasses and odd little men.

Here's the image with the sentiment in it with permission form Karen, be sure to use the link above to check out all her other great images.


Love ya much!
~Deb~

Another New Follower! 39 and Counting :)

Welcome, welcome, to my newest followers Sonia, MRodriguez, and Cat. I failed to acknowledge you yesterday and for that I am so sorry but thank you a million times over for joining us here! I love all the comments you've left so far and look forward to a great relationship on our blogs. If you put in a URL for your site, I've visited and will be by again! Hope you'll do the same here.

So for the next item of candy, I have some really cool beads again.


Aren't the swirly blue parts cool? I fell in love with these when I saw them so I bought one to give away and one for myself. Haven't used mine yet but I will! That's 10 items in the goodies pile now and 11 more to go.


Once again welcome, I'm so glad your here! On to 40!

Love ya,
~Deb~

I Wanna' Be in Pictures...

I was trying to take pictures of the Valentine card for today's post. I use a dining room chair as my easel for most things. It's white and nicely textured for the background behind most images. I keep one in my office for just this purpose. I turned from my desk to the chair to place the card on it and what did I see?


Guess she thought I was ignoring her. She doesn't even fit!!!! So she wanted to be in pictures, now she is :) Isn't my baby adorable?

Now for the card. It's a bit steampunky but not too much. The image is from Anji's Antics, the cogs cut on chipboard with  a Spellbinders die, the card was pre-made and ages old so I don't know the brand. Ribbon by Offray, TH Worn Lipstick and Wild Honey Distress Inks, Worn Lipstick Stickles, and Glossy Accents to flood the clock and texturize her hair. It's not as cute as Delilah but here's a look.


If your interested in the great font I used for this, it's called Sketches by Duerer and you can find it here.

Love ya,
~Deb and Delilah~

A Fool in Love

If you have a minute I could really use your help. Please go to this post after you finish this one and tell me your thoughts. I would really be indebted to you!

Another quick card. Blank on the inside so they can use it for Valentine or a just because.


The little girl is from Broken Box Stock, what a cutie! The heart sticker is by Mary & Co. (Mary Engelbreit) and the rest I made in word. I shadowed the background with colored pencil and used markers to make the little flowers.

Love ya,
~Deb~

Tuesday, January 29, 2013

Even Boys Like Valentines!

I remember how much my now 17 year old son, who doesn't like anything ;), used to love getting Valentines. With that in mind I created this cute boy's Valentine card. I'm not sure where I got the image and my Google image search turned up nothing. After fussy cutting, I popped up the truck bits and put the wheels on brads so they turn. Interactive for young guys is always cool! The little pom ribbon came from Pick Your Plum.

Easy card but I think some little guy will love it.


Love ya,
~Deb~

We're On A Roll!!! 38 Followers...

so 4 more items in the goodies pile!
The paper kit from the ship...perfect for a vacation journal. Contains 3 papers, some tags and other paper embellies, picture corners, ribbons metal tags  and brads.

2 stamps and some cute balloon embellishments.

Onward we go! just 12 more followers til the drawing, spread the word please so I can give this away!!!

Word Beads

Looking for my candy? Click here. Spread the word so I can add more goodies to the pile!!!  =o)

I bought a box of Bead Landing word beads a while ago. I used them on another project and today I pulled them out and found words like kiss, love, dream, crazy. sweet. love, heart...you get the idea. Anyway I thought I'd throw them into some V'day cards. So I made two different, pretty simple cards.

The first was a VERY simple card using an image from Dover Publishing that I colored in. I found a pack of pink glitter chipboard hearts at the Dollar Tree so I used that as my backing paper so to speak, and added the word beads. I didn't like the plain words so I took some pearl ended stick pins and colored them purple with a sharpie and glued them in the ends of the beads.


The second card  uses an image from Bearywishes. I added some round pearl beads in between the words this time and strung them on ribbon to match the image. I used the same ribbon at the bottom and added the rose (Recollections) to pick up the roses in the image. The image itself is popped up on pop dots.

For the card itself, I used an pre-made card that I texturized with a paper towel and some homemade glimmer mists. The spray bottle didn't work well so I poured it on and then used the towel to move it around and add the texture. Then I used Worn Lipstick Distress Ink to add in some pink to the blue.


I have several more V'day cards I'm working on so I hope you don't get tired of them  :)

Love ya,
~Deb~

Monday, January 28, 2013

Yippie! We're at 34 Followers...

So you know what that means. Two more items to the pile of goodies but first...

Welcome to my newest followers Anna and Angel! Hope you visit often.  I know I love to go visit the blogs of the people who follow me so I'll be over to check out what you're doing too!

The strand of beads as I mentioned earlier, and a package of card playing embellishments. Totally random stuff like I said. The next thing up is some stuff I got on vacation. No hints but i think you'll like it.

The main candy page will get an update so you can see the total package each time I add something. So with that...


Love ya,
~Deb~

Sunday, January 27, 2013

I Love You Beary Much

Looking for my candy? Click here. Still trying to get to 50 followers and I have some awesome goodies to add to the stash so spread the word if you would please.

We've all heard that sentiment and you've all probably used it too. Well I made a V'day card with that theme. Nothing new and unique but it turned out pretty with the colors etc. so I thought I'd share it with you.


Supplies List:

Red Recollections CS
Papers by Color Bok
Ribbon by Craftsmart
Ribbon Roses and Daisy from Michael's
Beary Much stamp from Stampin' Up
Pink Embossing powder from Zing
Labels #6 Spellbinders Die
and the adorable Bear image from Beccy's Place

I'm entering this into the Crafter's Cafe Challenge Blog. Check it out here.

Thanks for stopping by today! Have a wonderful Monday.

Love ya,
~Deb~

I'll get by with a little help from my friends...

Those friends are you! My business coach says we all have our own unique style and we need to identify it. Honestly, I think I'm pretty random and am having a tough time with this. So I'm calling on all my crafty friends to help me out here. Is there something specific in my work that makes you immediately know it's me who made it?

Please help me out here cause I'm stumped.

Love ya,
~Deb~

Big Eyed Bestie Card

Looking for my candy? Click here. Still trying to get to 50 followers  :)

If you haven't heard of Sharri Baldy, she creates these adorable big eyed girls that I've featured on the front of my card. She has so many wonderful images and she gives a few away on her blog from time to time as well. This happens to be one of the freebies that I snagged and decided would be cute for Valentines Day.


The die cuts behind are more of the items I won from the wonderful Astrid Maclean. The banner is made with chippies from Maya Road. The background paper was embossed with a Cuttlebug folder distressed with different TH inks and then sprayed with a mini mister to make them bleed some. I used my tiny letter stamps that I bought from Pick your Plum and then I added Stickles in Worn Lipstick to hide any little flaws.

For the image, after coloring, I flooded the glasses with glossy accents to give them that glass look. I still wasn't fully content so I flooded the balloon and the roses too. I added little silver dots with a pen where she had left space on the tops of the glasses. Gosh she is so cute!!!!

So go check out Sharri's work, you won't regret it (well maybe you will 'cause you'll want to spend a ton of money buying bunches of images). Her link is at the top.

Love ya,
~Deb~


Friday, January 25, 2013

Vintage Valentines

Looking for my candy? Click here. Still trying to get to 50 followers  :)

WOO HOO! I won 2 sets of fabulous dies from Astrid Maclean on her FANTASTIC site Astrid's Artistic Efforts. They were in my mail box when I got home from the trip so naturally I had to use them right away, he he. I made a couple more Valentines cards with them. This time vintage. The Creative Goddess, better known as Vicki O'Dell gave us this wonderful Vintage Valentine image. As usual I made two cards with the same image but different looks.


See the tan fringe above? I won that from the lovely Nikki over at Graphix and Designs a while back. I really love it on this card. It adds just the right softness. The flowers are all Recollections and the paper is as well. I added little pink pearls I picked up at Michael's. Don't know how well you can see it but I used Glossy Accents to make the birds pop a bit.

Speaking of how well you can see it, do my pictures look better lately? We got a new Canon EOS Rebel T3 for Christmas and I think it made a huge difference in the quality of my pics.


The inside has the same Recollections paper, the sentiment is from the Valentines club at Create with TLC.


I made the stick pin with beads from different strands, Plaid and Bead Landing. See the frosted white one? I bought an extra strand (it has some gold and white beads too) and it will be the next thing up in the candy give away, still holding at 32 for now but I'm hoping for some new followers soon so I can add all the fun items I bought. The ribbon is actually a recycle item. It came off a Christmas gift. The paper is from Recollections again.


This sentiment was actually an embroidery pattern from Mary Corbet's Needle 'n Thread. I put it in Paint and colored in the images of the flowers before I printed it.

I distressed all of the die cuts with Tim Holtz inks, Worn Lipstick and Frayed Burlap, to make them appear more vintage. Love those inks! The lace on the front is an Offray ribbon.

So that's my set for today. Hope I've inspired you to make something vintage now. I am entering them in a couple of challenges so we'll see how it goes.

Love ya,
~Deb~

Thursday, January 24, 2013

First Valentines Day Cards for Me and a Freebie for You

It's getting close to Valentines Day and I hadn't made a single card. Being busy with the trip put me a tad behind so I decided I better get some made. You know me, I usually try to make two of everything and this was no exception.

I had bought some Doodlebug Design window cards a while back. The pack had multiple colors in them so I pulled out a pink and red. I embossed the front panel with a Cuttlebug folder from the Love's in the air collection and then lightly sanded to get a little white showing through.

I added some paper on the inside from Recollections All Seasons pad to peek through the window, and made some punched hearts also out of Recollections paper which I layered and added some pink pearls. On the top of the card I placed a bit of Paper Studio ribbon with  a button and bakers twine.

Next I took a Sassy Studio Designs eye image and layered over the iris to make part of the sentiment, popped it up on dots and then created the bottom sentiment (it's your freebie at the bottom). I would love to share the eye with you but I have to get permission from SSD first so we'll see.

All in all a pretty simple card but cute I think.


Now for the freebie, enjoy and please leave a comment if you grab it!


Love ya,
~Deb~

Wednesday, January 23, 2013

Get Well Cards!

...or a good reason to make them anyway!

I saw this on a friends FB page and thought it was the perfect reason to make some get well cards.


It might be a good marketing line too LOL.

Love ya,
~Deb~

I'm Back and Totally Relaxed!!!

Looking for my candy? Click here.

My cruise was awesome! It was my first time on a ship that size and I would recommend it to everyone. It was so completely relaxing and yet there was plenty of fun to be had. We line danced, went to live musical shows where the costumes were phenomenal, saw some comedy skits/games, and on shore we snorkeled, swam, sunbathed, climbed Mayan ruins, shopped, ate fantastic food (I gained 7 pounds :( ...) and I never got sea sick! In short it was one of my best vacations ever. I hope to have some pics to show you soon but I have to wait for others to email them to me...I forgot my camera in my office, my blond moment.

Yesterday I made two more V'day cubes. I used the same backing paper from Create with TLC as in my last one but used different accompaniments. The first pic is a bit blurry since the camera focused on the sparkly heart in the background. The rest should be clear though.


'Til next time...

Love ya,
~Deb~

Sunday, January 20, 2013

A Candy Giveaway

I came back from vacation to discover that this great set of candy was being given away by Sonia at SK digis. She has some really cute stuff if you've never checked her out. She is giving away a set of digis to celebrate her 100th post. You can enter by clicking on her link above or in my side bar.

Congrat's on 100 posts Sonia!


Love ya,
Deb

Wednesday, January 16, 2013

Valentines Cube

So I saw a couple of really pretty cubes that were done vintage style and I considered making one. Then, I got this cute Hershey wrapper from Paulette at Create with TLC as part of her Valentines Club Kit. I was sold! I may not use it as it was intended but the paper was fab-u-lous! If you haven't tried her clubs you should! Worth every penny, she give you sooo much stuff! But I am getting off topic so back to the project...

I had ordered some 1 1/2" solid wood blocks from Pick Your Plum for Jen's future MIL, she wants to make some ornaments for next Christmas. So with the blocks already in my possession  and the wrapper/paper from the club kit, I knew I had to make a Valentine's Cube.

First I edited the wrapper so I only had parts of it in the correct measurements to fit the blocks. Then I brushed some glue on the blocks, adhered the papers, sanded and distressed it lightly. I added some matching ribbon, an organza rose that I tipped with Worn Lipstick Distress Ink, and a chip board key from the packs I told you about last post. I painted the key silver first, just one light coat. Then I dry brushed some black paint to highlight the raised areas. Lastly I used more Worn Lipstick ink to add some pinkish color to it. Then after adhering these,I used some Glossy Accents and dotted the polka dots on the sides that said "valentine" and sprinkled it with white glitter to accentuate the dots. I added the pearl heart ribbon around the top edge and then finally I placed two pink lace flowers, one on each side of the blocks to hide where the papers met. All told, took less than an hour to create start to finish including dry time.


So that's my first Valentines project!

Love ya,
~Deb~

Monday, January 14, 2013

Decorated Soap

While I was making the Popsicle soaps, I went ahead and made a few bars as well. I was inspired by Shirl over at Shirl's cards . She made some gorgeous soap with Ophelia on it. I wasn't quite that ingenious, still trying to figure out her methods, but I did come up with something I think is kinda cute for my first try. I know I'll get better with time and maybe some help (hint, hint Shirl  :}).

I'd love to hear your thoughts, have you tried this? Is there a better way to make things adhere to the soap?

Here's what I did, I first stamped some tissue with the little bird cage (a studio g stamp). Then I tore the tissue to the shape I wanted on the bar. I stared at it for like 10 minutes trying to decide the best way to make it stick. Just to let you know, staring doesn't work, the soap never did answer me (stupid soap) !
So, left to my own devices, I tried water. Nope, t peeled up from the edges after it dried. So next I tried a touch of tacky glue mixed with a lot of water. That was the trick! It stuck beautifully and I don't think there was enough glue in it that if they wanted to divest the bar of it's embellishments and use it, they still could.

So next I wrapped the lace around the outside edge and used the same trick. It didn't work as well. A little heavy I think, so I added a drop of glue in the center of each side and at the ends where it attached. Had to hold it for a while but that worked.

Next I wrapped the thinner velvet ribbon around the first ribbon and then tied a bow. That stayed on it's own without any glue. So I added the flower with a dot of glue.

The bird in the corner came next, I had found these paper tags and chippies at Micheal's. They had sets in the dollar bin with like 20 pieces in a pack made by Studio 18. Random stuff, some tags, birds, crowns etc. I pulled out the bird, dry brushed it with yellow paint to match the soap and then used a black pen to draw in the tail and highlight the raised feet. I glued that to the ribbon edge so there wasn't any more glue on the soap bar.

Then I decided I wanted to add the pearl string so it would look like the cage was hanging from it. Not sure that was accomplished but it still looked good so on it went. I used a drop of glue on the tissue first and then used my heat gun to slightly melt the soap to adhere the ends. It worked but I had some lumps and bumps that I had to later work out. I did the same for the three little pearls in the corner.

So I won't call this a total success but it's cute and smells heavenly!


Please tell me the secret to adhering the tissue and jewels!!! I can go commando if I have too LOL!


Love ya,
~Deb~

Saturday, January 12, 2013

Another Version of Jen's Heart

So I decided to do some different text with the heart to give you another option. Enjoy! Don't forget to leave a comment so Jen continues to create for us.


Love ya,
~Deb~

Friday, January 11, 2013

Jen Strikes Again!

OK I promised you a freebie and Jen (my daughter for those who are new) didn't let me down! She created a fabulous pencil drawing which I converted to digital and added the sentiment. I hope you all enjoy this! It'll be at the end of the post. PLEASE don't forget to leave her a comment so she keeps drawing for us.

I've scheduled a couple of post for the week while I'm gone but honestly didn't get as much done as I had hoped. What I DID get done turned out pretty good though.  Hope you all like it and I'll look forward to reading your comments upon my return.

Have a great week, I'm off to go CRUISIN' woo hoo!


Love ya,
~Deb~

Thursday, January 10, 2013

Rose Petal Hand Soap

I bought these soap petals in the bridal section at Michael's. They weren't cheap but I thought they would work well. I heated my melt and pour, added the scent and then dipped each petal in to coat. I shook it a bit so it would set a bit before I set it on the waxed paper. I wanted them to retain their shape with out little hangy (I know that's not a real word but that's what I call them lol)  pieces.

It took me about 2 1/2 hours to do 230 of these, not bad. I packaged them in organza bags, 10 petals in each pouch. To us them you pull one out, there is just enough soap for one hand washing and then you throw the petal away when you're done. Cute for guest bathrooms in a little silver dish or something.


One more day here at home, before we leave, so I'll try to get something special up to keep you all busy while I'm gone (that's a hint that a freebie is on it's way!)  
Love ya,
~Deb~