WARNING!!! This is a picture heavy post and may take some time to load in your email or browser.
It's here! I've had several requests for this tutorial on the explosion box with the cake center that I made. You can find the original
here. I've tried to make this as simple as possible but it is a lengthy process and you will need to set aside 1-3 hours to complete this depending on your level of craft skills and the tools you have at hand. It's worth the time, I've gotten rave reviews on them.
P.S. If you have a cricut, silhouette etc, you can do this in 1/2 the time with perfect results using a cutting program for the squares and paper. What I'm teaching you is the way to do it by hand. I have a cricut but it's a pain to get it out, set it up and I haven't mastered it yet anyway. Someday I'll find the time to organize and learn. In the mean time by hand it is!
So here we go...
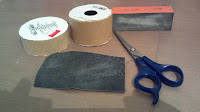
Tools Needed:
Scissors Rough Sandpaper
Paper Cutter Fine Sandpaper
for buffing
Exacto Knife Pencil
Bone Folder Ruler
(clear if you have it, makes things a bit easier)
Paint Brush Brayer
(don't have one? Heavy books work too)
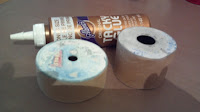
Recycled Materials Needed:
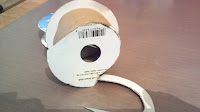
2 sizes of empty ribbon spools
A box from cereal, pop/soda, crackers etc. (in other words thin chipboard)
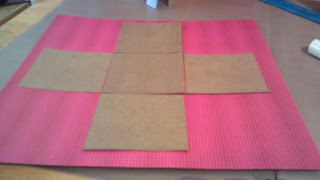
Cut the box into the following size pieces:
3 1/2"x3 1/2" square, you will need 5 this size
3 3/4"x3 3/4" square, you will need 1 this size
3 3/4"x 1 1/4" rectangle, you will need 4 this size
Craft Supplies Needed:
Acrylic Paint Embellishments
Double Stick Tape Glue (such as
glossy accents or something that dries clear and fast)
1 Sheet of 12x12" fancy paper
2 Sheets of 12x12" coordinating paper
1. Cut the edges of your ribbon rolls flush with the ring. Don't do what I did and cut it to close. It's best if you have the bottom area still on and you're going to sand it smooth anyway.
2. Using the rough sandpaper first, go around the edges to smooth then buff the scratches out with the fine sandpaper. I like to use a nail buffer for this part. It's easy to hold and flexible but use what ever you have on hand. If you have a graphic heavy spool like my
Toy Story one you may want to sand the graphic off a bit too.
3. Use a thick fast drying glue to put the smaller spool on top of the larger one.
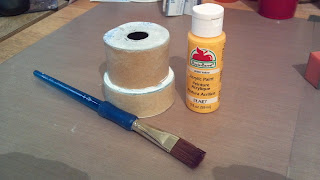
4. Paint your "cake". Here's a tip, if you're painting it a bright color, paint it black first, the resulting top color is brighter. I didn't do that because I wanted a more muted look but try it, you might like it!
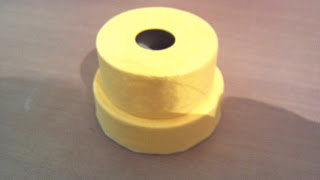
5. I've done two coats of paint here. Set it aside to dry while your working on your box.
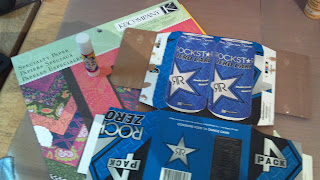
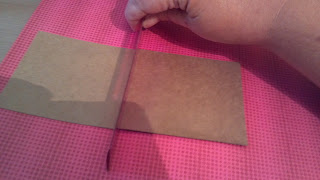
6. Choose your paper and get your empty box, it's time to get out the cutter. (I told you I was addicted to Rock Stars)
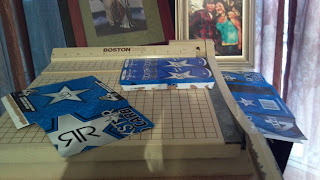
7. Cut your pieces for your box as described above.
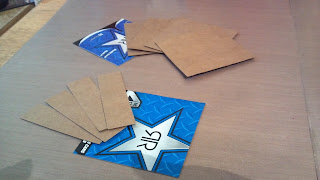
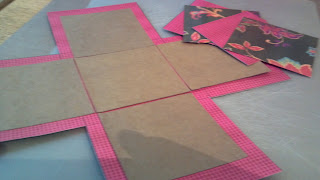
This is what you'll have for cut chipboard.
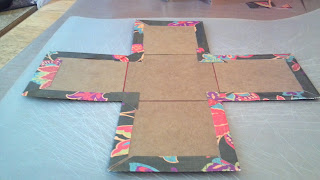
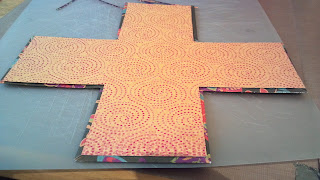
8. Place your first piece 1/2" in from the edge in the center of one side, using glue or double stick tape. using a thin ruler as a spacer, put your next piece down, then the third forming a row. Using the center piece as your guide and your ruler as your spacer place the two side pieces on.
It should look like this.
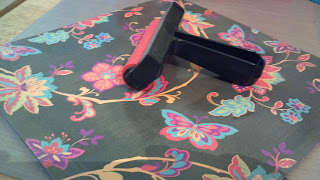
9. Flip your paper over and using a brayer push down on the chipboard pieces to secure firmly. You can also put some books on top of it for about 20 minutes or so if you don't have a brayer. The point is to get it smooth and flat.

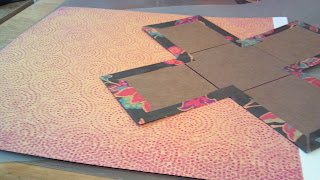
10. Flip your paper back over and measure then draw lines 1/2" around all sides.
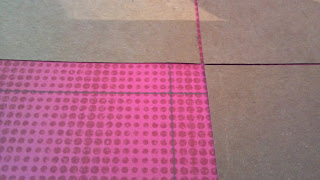
Here's a close up of the drawn lines.
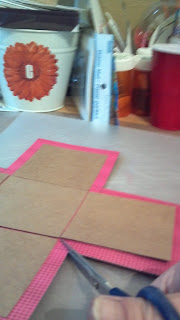
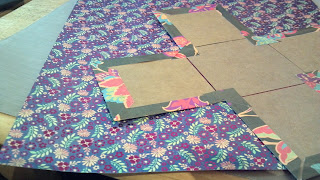
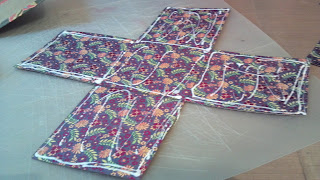
11. Cut out the squares you just drew as shown.
12. Using your scissors, cut from the corner of the paper to the tip of the middle chipboard piece as shown on all four corners.
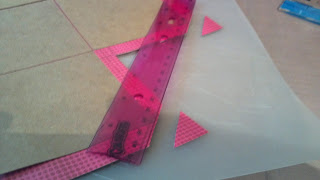
13. Using your ruler, miter your outside corners by lining up the ruler on two corners right to the peaks of the chipboard and then cut with an exacto knife.
DON'T THROW THOSE CORNER PIECES AWAY!!! You will use some of them later.

This is what it should like like when all corners have been mitered.

14. SLOWLY bend up your sides. If you go to fast your paper may crack. If your using really heavy paper like I did, it helps to score it a bit on both the front and back to give it a little extra "spring".

15. Glue or tape down your sides all the way around.
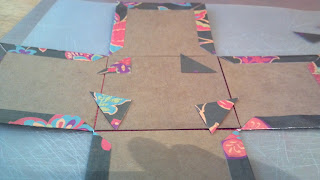
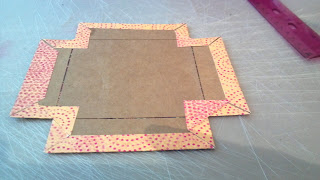
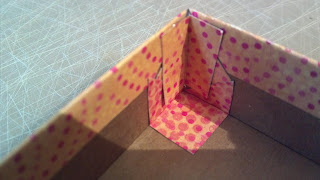
16. Grab those corner pieces you saved it's time to use them! They will go in the corners as shown here.
17. Glue them down.
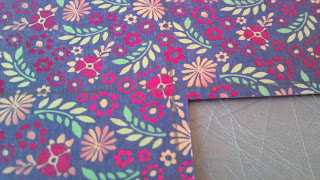
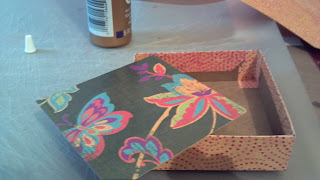
18. Choose your coordinating paper for the inside of the box. I liked this orange and pink swirl pattern since the box had big flowers.
19. Flip it over and use the reverse side to draw and cut on. The one I chose was tough to see because of the pattern so I'll show you some close ups.
20. you can barely see my lines here but I first drew around the box, then measure in 1/8" all the way around so there would be an inside border as shown below.
21. Check to make sure of the fit before gluing down.
22. I used white Aleene's tacky glue for this tutorial so you could see it easily. While it works, I would use double stick tape for a clear glue.
We're almost there! Lets move on to the cover.

23. Following the same steps you used for the box, place your lid pieces on your chosen paper. I used the same paper that I used on the inside of the box for continuity but you definitely don't have to. Measure the same 1/2" all the way around and cut as you did for the box. (refer to steps 8-17 if you need)
24. After it's glued it will look like this. Now this is where I vary from most tutorials you will see. I don't like having flaps on the outside of my lid showing so I glue all the edges down. You'll see in the next step how I make that work.
25. Cut yourself some 1"x1" scraps of your coordinating paper. Score them down the center and either apply tape to the edges of them and stick the corners together or use glossy accents and glue them in. You may have to hold them shut for a couple of minutes each but it's worth it to me not to have those ugly outer flaps.
26. Using your corner scraps form your outer box paper, cut a piece just shy of 3 3/4"x 3 3/4" square and glue to the bottom/inside of your lid.
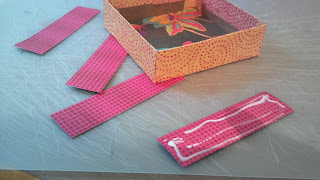
27. Cut strips of the same paper just shy again of 1 1/4"x3 3/4" rectangles for the inside edges of the box. You'll need four (4). Glue them in. Run a bone folder around it just to make sure they are in flat and to help seal them down.
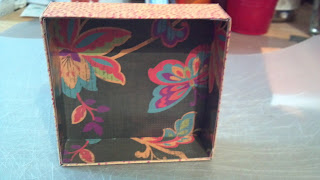
This is the finished top.
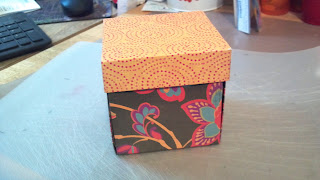
Put your top on your box and VOILA! Cute explosion box.
Lastly, decorate your "cake" with embellishments of your choice and then glue it to the center of the box. You can decorate the inside box flaps and the top of your box too.
Well that's it, I hope this was an easy to understand tutorial and you find it helpful.
If you still feel lost and want to watch a video, I found a good one on you tube. It's LOOOONG, eight videos in all (although only 1-5 are really pertinent), but he does a good job explaining and you see every step and mistake he makes. Here's the link
http://www.youtube.com/watch?v=JGa5gerjtcs
by Jim the Gentleman Crafter. He uses structure strips which I don't, and he puts the flaps on the outside of the box lid. Other than that, it's the best video I have found.
It took me all day to create the box, take the pictures and write the tutorial so tune in tomorrow and I'll show you not one, but two finished boxes!
Love ya,
~Deb~


.jpg)
.jpg)

.jpg)
.jpg)
.jpg)
.jpg)
.jpg)


